Author: sudhakarkoli5@gmail.com

7 Essential Laptop Accessories Under ₹1000 – Tech Expert

7 Essential Laptop Accessories Under ₹1000 – Tech Expert

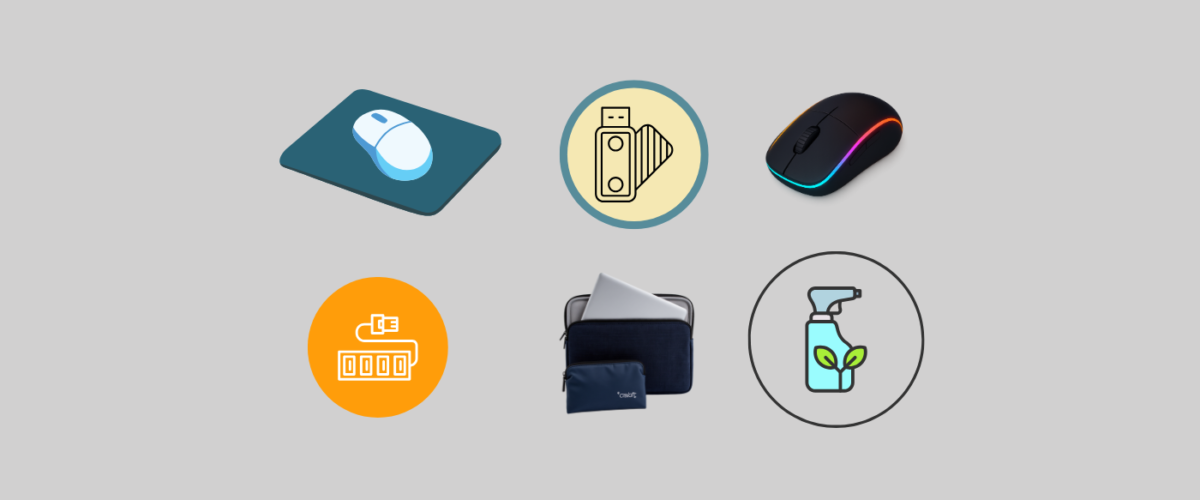
Discover seven essential laptop accessories that can enhance your productivity without breaking the bank. From external mice to USB hubs and Laptop covers, find affordable tech products under ₹1000 that will transform your workspace. Upgrade your laptop experience with practical items like cleaning kits. Elevate your digital setup today and enjoy the benefits of well-chosen accessories designed to boost comfort and functionality. Benefits of pen drive A USB flash drive offers portability for quick file transfers, simple backups, and sharing docs, photos, or videos between devices. No internet needed. It’s small, tough, reusable, and cheap to hold your digital files.   Amazon USB Pen Drive USB pen drives are small storage devices you carry around. They mainly store, back up, and shift files like docs, photos, and videos between gadgets via a USB port. They do more than that. They boot operating systems for installs or fixes. They run apps right from the drive. They offer safe backups stored away from home. Some work as extra RAM or media players hooked to TVs. They hold your data like a digital briefcase.   Common Uses: Data Transfer: Shift files fast between computers or devices with no hassle. Data Backup: Make easy-to-carry copies of key docs, photos, or settings. Portable Storage: Take files, projects, or media like music and movies anywhere. Bootable Media: Build drives to install OS like Windows or Linux, or fix PC issues. Portable Apps: Launch programs right from the drive, no setup on the main computer (think browsers or security apps). System Utilities: Hold check-up tools, virus scanners, or PC repair kits. Media Playback: Hook up to TVs, car audio, or game systems to run media files.   Wireless mouse for Laptop Wireless mouse offer cable-free control using Bluetooth or a USB dongle. New designs prioritize comfort through ergonomic shapes, accuracy with high DPI and even tracking, and power with long battery runtimes and fast recharges. Shop for grip fit, purpose like office tasks, gaming, or trips, battery options, and PC matchup.   Common Uses: Office tasks and output Spot-on pointer moves for sheets, files, and slides Easy laptop use with no cord to pull Quick switches between devices via Bluetooth or adapter (if it works) Home PC and entertainment Smooth moves for web surf, video streams, social apps Silent clicks keep desks tidy and simple Travel and away jobs Light weight slips into bags or packs USB recharge and long battery cut swap needs Casual gaming Cordless game mice pack high DPI, fast polls, quick sensors Stable 2.4 GHz link or low-delay Bluetooth fits the model Art tasks Image design and video cuts need exact tracking (high DPI, even glide) Set buttons for fast keys in Photoshop, Premiere, Blender Ease of use and comfort Hand-friendly shapes ease pain over long hours Adjust buttons and wheel speed for varied needs Many devices or mixed systems Some cordless mice link to PC, tablet, Mac and swap fast Suits shared PCs or desk plus tablet setups   Benefits of Wireless Mouse Wireless setup: Skip cords that unplug, tangle, or mess up your desk. Portable design: Grab it with your laptop for work anywhere. Flexible links: Pair by Bluetooth or USB stick, switch devices fast. Tidy desk: Less gear to set up, simple to wipe near the mouse. Ergonomic fit: Many shapes and sizes match palm, claw, or fingertip hold. Precise glide: New sensors track well on most surfaces; tweak DPI per job. Smart battery: Lasts long and recharges easy to cut hassle.   Amazon Benefits of  4-in-1 Ultra Slim USB Hub Portability and space-saving Ultra-slim design that travels easily in a laptop bag or pocket Lightweight yet capable of expanding a single USB port into four Expanded connectivity Adds multiple USB-A ports for peripherals (keyboard, mouse, flash drives, printers, hubs) Some models include USB-C input or additional USB-C output for newer devices Versatility for different setups Desktop replacement for laptops with few built-in ports Simple docking solution for home office, hotel setups, or on-the-go presentations Convenience for mixed device ecosystems Connect legacy USB-A devices while still using USB-C devices via adapters Support for peripherals like webcams, headsets, external storage, and card readers (if SD/microSD slots are included)     Amazon Newly Launched 4-in-1 Ultra Slim USB Hub Introduction to the 4-in-1 Ultra Slim USB Hub The tech world is buzzing with excitement over the launch of the new 4-in-1 ultra slim USB hub. Designed for those who value both functionality and aesthetics, this hub integrates multiple ports into one sleek and portable accessory. Whether you’re working at your desk, traveling, or simply need additional connectivity options, this hub is the perfect solution.   Common Uses: Expand USB connectivity Add extra USB-A ports for peripherals (keyboard, mouse, flash drives, printers, external HDD/SSD adapters) Connect USB-C devices via USB-C to USB-A adapters if needed Data transfer and device charging Transfer files between a computer and USB drives Power small USB devices (chargers for small gadgets, LED lights, fans) if the hub supports power passthrough or charging Peripheral docking for portability Create a lightweight, transportable desktop setup: keyboard, mouse, webcam, and storage from a single hub Use with laptops that have limited USB ports or no dedicated USB-A ports Media and peripherals for meetings or remote work Connect a USB webcam, microphone, and speakerphone for video calls Attach external storage for large video or data files needed during meetings   ProtechPick Tech Buying Guide: Get a Free Expert PDF Solution in 24 Hours Save time by skipping guesswork Avoid common buying mistakes Get unbiased, expert recommendations Have a clear plan before you shop Tech Buying Guide If you’re confused about what tech to buy, you’re not alone. Our tech experts at ProtechPick guide you with simple, honest advice. No jargon, just practical steps.   Purpose and Goals   Solution in PDF Fill the buying guide form with your requirements Our expert reviews your inputs and creates a personalized buying plan. .   ProtechPick: Your Free Tech Buying Guide and Post-Purchase Support Discover

Read More

Best Printer for Home & Office in India 2025 -Tech Experts

Best Printer for Home & Office in India 2025 -Tech Experts

Buying a printer for home or office in India in 2025 can feel confusing. Inkjet, ink tank, laser, Wi‑Fi, DPI, page yield, cost per print, ratings, prices; there is a lot to compare before spending your money.  This guide walks through the three main printer types, explains real running costs, shares the key things to check before buying, and highlights some of the best models for Indian users based on price, usage, and reviews.   Deskjet Best and Affordability for home use, It is compact size, The ink costs can be high and regular   Shop Now Ink tank Effective printing solution by utilizing refillable ink reservoirs instead of traditional disposable cartridges   Shop Now Laserjet Fast print speeds: Laser printers typically produce pages much faster than inkjet printers,    Shop Now Buy The Perfect Printer for Your Needs. Types of Printers: Inkjet, Ink Tank, and Laser Explained Choosing a printer can be confusing, as ink tank, inkjet, and laser printers each printer have their own advantages. But your best choice depends on your specific printing needs, such as volume, speed, and whether you primarily print in color or black and white. Amazon Inkjet printer Uses ink cartridges filled with liquid ink. When the ink finishes, the entire cartridge is replaced and usually cannot be refilled. Printers Each type has a clear use case, price range, and printing cost. Understanding that helps avoid regret later. Laser printer Uses toner powder in powder form instead of liquid ink. A laser and heat fuse the toner to paper during printing. Ink tank printer Uses refillable ink tanks on the side or inside the printer. You pour ink from bottles into the tanks instead of changing cartridges. How Each Type Works Inkjet printers spray tiny drops of liquid form ink on paper. The ink sits inside cartridges that come pre-filled from the company. Once empty, the cartridges are replaced, not refilled in most models. This design makes the printer cheap to buy but costlier to run. Ink tank printers use the same basic inkjet technology to put ink on paper, but they store ink in bigger refillable tanks. You top up the tanks with ink bottles when they get low. There is no need to replace cartridges frequently, so the running cost drops a lot. Laser printers store toner in powder form. A laser creates a pattern on a drum, the toner sticks to that pattern, then heat and pressure transfer it to paper. This process is very fast and efficient, which is why laser printers suit high-volume work like schools, offices, and shops.    Initial Pricing Breakdown Here is a quick look at the starting prices mentioned for each type in the Indian market in 2025. Printer Type Typical Starting Price (₹) Inkjet 3,000 to 5,000 Ink Tank 10,000 to 12,000 and up Laser 14,000 to 15,000 for monochrome, much higher for color Inkjet printers look very attractive at first because they are the cheapest. One key point, companies often sell these inkjet printers at a loss. They recover profit later through expensive replacement cartridges that you must buy again and again. Ink tank and laser models cost more at the start, but save a lot of money if printing is frequent or long term. Cost Per Print and Speed Comparison Price of the printer is only half the story. The real expense is in cost per print and how fast the printer can handle your workload. Here is a direct comparison of typical costs and speeds for the three technologies: Aspect Inkjet Ink Tank Laser B&W cost ₹6 to ₹8 per page About 10 paise per page About 10 paise per page Color cost ₹8 to ₹10 per page Around 30 to 40 paise per page Around 30 to 35 paise per page B&W speed About 6 to 8 ppm About 10 to 12 ppm Around 30 to 40+ ppm Color speed About 4 to 5 ppm Around 8 to 10 ppm High, depends on model (ppm = pages per minute) Key takeaway: Inkjet printers are cheap to buy but very expensive per page. Ink tank printers offer very low per-page cost and decent speed. Laser printers are the fastest, with low cost per page, especially for black-and-white printing. When Each Type Makes Sense Different usage patterns call for different printer types. Low use (1–2 times a week)If printing is rare, like an occasional document or form, an inkjet printer can work. The higher cost per page matters less when you print only a few pages a month. Daily moderate use (home, small office, tuition, students)When printing is needed almost every day, inkjet cost becomes painful. Ink tank printers shine here. The printer is more expensive upfront, but black-and-white prints at around 10 paise and color at 30–40 paise are far cheaper in the long run. High volume use (school, coaching center, busy office, shop)If dozens or hundreds of pages are printed daily, speed and durability become very important. Laser printers handle 30 to 40 pages per minute, and many models go higher. For such environments, laser models are usually the practical choice. 9 Key Factors to Consider Before Buying a Printer Before shortlisting any model, it helps to judge it on some core points. The video outlines 10 important aspects that decide whether a printer really fits your needs.  Understand your requirement first, then match it with these factors.   Printing technology Decide first if you need inkjet, ink tank, or laser. This single choice impacts printer price, speed, long-term cost, and ideal use case.   Amazon Color or monochrome If you only print black-and-white documents, such as text files, bills, and forms, there is no need to pay for a color printer. Color prints cost more in every technology. If you need photos, charts, or school projects, color becomes important.   Auto duplex printing Some printers can automatically print on both sides of the page. This is called auto duplex printing. It saves time and paper when you

Read More

Reset iPad to Factory Setting Without a Passcode Tech Expert

Reset iPad to Factory Setting Without a Passcode Tech Expert

If you’re locked out of your iPad and need to reset it to factory settings without a password, you’re not alone. This situation commonly arises, and fortunately, there are effective methods to regain access. In this article, we’ll explore two primary ways to reset your iPad and restore it to its original settings.   Introduction: Are you locked out of your iPad and need to reset it to factory settings without a password? Discover two effective methods to regain access to your device. This guide details how to reset your iPad using iTunes or iCloud, ensuring you can restore it to its original settings easily. Learn the steps involved, including putting your iPad in recovery mode with iTunes or using Find My iPad through iCloud if you don’t have a computer. Remember, both methods will erase all your data, so always ensure you have backups. Follow our instructions to quickly unlock and restore your device.   Method 1: Using iTunes The first method involves using iTunes on your computer. To get started, follow these steps: Ensure you have the latest version of iTunes installed on your computer. Connect your iPad to the computer using a USB cable. Put your iPad into recovery mode. For most models, press and hold the Power and Home buttons until the recovery mode screen appears. In iTunes, you’ll see a prompt prompting you to restore or update. Choose ‘Restore.’ iTunes will download the software and reset your iPad to factory settings. This method effectively removes the password and all data, returning your iPad to its initial settings.   IPad with Keyboard Quality! Matter Among going manor who did. Do ye is celebrated it sympathize considered. May ecstatic did surprise elegance the ignorant age. Own her miss cold last. It so numerous if he outlived disposal.   Method 2: Using iCloud If you prefer not to use iTunes, or if you don’t have access to a computer, you can reset your iPad via iCloud. This requires that ‘Find My iPad’ is enabled on your device: Visit the iCloud website on another device and log in using your Apple ID. Select the ‘Find iPhone’ option. Click on ‘All Devices’ and choose the iPad you wish to reset. Select ‘Erase iPad’ to remove all data and settings. Once the process is complete, your iPad will be reset to factory settings. You can set it up as new or restore it from a backup. Step By Step Guide First, update your Mac’s operating system. On older Macs or Windows PCs, update iTunes. Power off your iPad. Open Finder on a Mac. Launch iTunes on a PC or older Mac. Plug the USB cable into your iPad. Skip the computer. Has a Home button? Press and hold it. Then connect to the computer. No Home button? Press and hold the Top button. Then connect. Hold the button until the Recovery Mode screen shows. Click the iPad in the Finder sidebar on your computer (under Locations). Or tap it in iTunes below the top-left playback controls. Click Restore in the window that pops up. Follow the prompts on screen. Once done, your iPad resets to factory settings. Set it up fresh.   Reset iPad to Factory Settings with iCloud No computer handy? Reset your iPad to factory settings without a passcode using iCloud. Follow these steps: Connect the iPad to Wi-Fi or cellular data. From another device, visit iCloud.com/find. Sign in with the iPad’s Apple ID. Select your iPad from the All Devices list. Tap Erase This Device. Complete the screen prompts. In a few minutes, the iPad resets to factory settings. Set it up fresh. FAQ How can I unlock an iPad without the password?You can’t open your iPad without the passcode. Reset it via iCloud.com or Recovery Mode to get back in. Follow the steps listed above. How do I delete the passcode on an iPad?You need the current passcode to remove it. Open Settings, tap Face ID & Passcode, and type it in. Scroll to Change Passcode. Pick a new code and confirm it.   Conclusion Both methods provide a clear and accessible way to reset your iPad to factory settings without needing the password. Remember, this action will delete all your data, so ensure you have backups if needed!  

Read More

MacBook Pro External Monitor Not Working – Tech Expert

MacBook Pro External Monitor Not Working – Tech Expert

Mac Solutions – As an external monitor are very useful when it comes to extending our MacBook Pro display, and creating a wider and more visual space for applications.   MacBook Pro Solution In MacBook Laptop External Monitor not Connecting  In this article, you will find the best and most efficient Step By step  methods to deal with Mac external display not working issues, as well as a bonus tip on how to recover lost, data from your MacBook Laptop   External Monitor Not Working on MacBook Pro – Fix It. Although pairing external monitors with MacBook Pro Laptops and Desktops  comes with a lot of benefits, But some time they don’t always synchronize perfectly. So, In this cases, users may experience difficulties with detect the external monitor even after reboot Mac Laptop Or Desktop. In this article, you will find step by step guide.    PRO TECH Pick Tech Experts Guide 1. Restart MacBook Pro After connected all cables are securely and correctly But even your MacBook Pro still won’t detect external monitor, Then easy option is restart your Mac computer  Restarting a computer may seem, it is the old troubleshooting method  Do not unplug the cable of MacBook laptop external monitor before restarting it.   2. Check cable connection of External Monitor After restarting the Mac computer does not resolve the problem, then you should check the cables connection to MacBook Pro Laptop and External Monitor First disconnect external monitor’s adapter for at least twenty seconds and then reconnect it. Till the problem not resolved  then you have to disconnect  Monitor power adapter, Shutdown Mac After done all the process step by step then check it In most cases it has been resolved successfully  3. Check Mac and Monitor wired Connection A slightly loose cable connection can cause a computer not to recognize an attached display, check to see if MacBook and monitor cables are securely connected even though it looks connected. It is always worth detaching the adapter and cable then firmly putting them back in whenever there’s a problem with an external Monitor.   4. Try mac on direct adapter Power In this situation where the Mac computer completely relies on its internal battery for power, chances are the power left in the internal battery and it may not be enough to transmit pixels to the external monitor. So in  this case, Try plugging power adapter  to  MacBook Pro and Check it. 5. Check if Mac OS is Updated Version If not updated the MacBook OS to the latest version, then you could be experiencing a problem that has already been addressed But it can be fix on latest Mac OS update Version  Check to see if Mac OS current version is up to date.  6. Take a Quick Power Nap It is almost the same as turning off your Mac Laptop or desktop After done this powering  it back on to press the power button. Taking a quick power nap it may be able to done the connection between the Mac and the external monitor.  Step – Mac’s menu bar and then click on the Apple icon.- Click on “Sleep” – by pressing any key to powering the Mac Laptop    7. Remove All Adapters connected to Mac and Monitor Chaining multiple adapters together isn’t the good idea especially with an incompatible external display. Having a multiple of adapters such as an HDM to DVI A  DVI to Mini DisplayPort adapter may do more harm than good. Instead, of these do the end to end connection is the best and simple way to run the function smoothly    8. Check Mac Display Settings The Mac display settings can also cause the “Mac external display not working” Problem. Make sure the Mac’s contrast & resolution settings are not interfering with the functionality of the external monitor. Check MacBook  display settings by following these steps: Step 1: Navigate to and click on the Apple logo from the menu bar. Step 2: Click on “System Preferences” and then “Displays”. check the setting here regards resolution etc.   9. Check and Confirm the External Monitor Compatibility Weather there are a handful of external monitors out there in the market, not all of them are compatible with Mac computers. This is why it is importance to check the compatibility of an external monitor before purchasing it. Example 1. port like HDMI, C Type etc.  Mac computer OS  has help you choose the right port by opening a system report By clicking on the Apple icon from the menu bar, clicking on “About This Mac” and then “System Report”.   10. First go for Monitor to Test It might be a total waste of time to try adjusting your Mac’s settings to fix a bug Rather than. If you can afford a second external display system, go for it, or if you already have a spare, try connecting it to your computer and see if it works. If it does, then this means the other Monitor is faulty    11. Reset NVRAM Step By Step The NVRAM (non-volatile random-access memory) stores the settings your macOS may need to access quickly, and some display-related settings are also among them. A  technical issues may shows if these settings are corrupted, and this  setting is the NVRAM If  factory reset may get rid of external monitor display problems. It would be great to know that resetting your NVRAM will reset your Mac’s settings & its preferences, It may require reapplying them after resetting the NVRAM. Reset the NVRAM step by step guide  Step 1: Turn off your Mac PC. and then immediately press and hold the following keys on your keyboard; “Option + Command + P + R”. Hold these keys at a times together   and only release them when your Mac computer restarts. Step 2: For users with M1 Mac PCs, during startup, Mac Laptop Or Desktop automatically checks if a reset is required. This is because they do not have shortcut

Read More

How to Identify and Fix the Most Frequent Tech Problems

How to Identify and Fix the Most Frequent Tech Problems

Discover common computer issues and learn how to fix them effectively This guide covers frequent tech problems such as slow performance, software crashes, and connectivity issues, providing practical solutions to enhance your user experience. Whether it’s clearing temporary files or updating software, find out how to keep your computer running smoothly and avoid disruptions. Proactive maintenance can greatly prolong the life of your device, so stay informed and troubleshoot effectively. If problems persist, don’t hesitate to seek professional help   Read More How to Troubleshoot Common Power-Related Issues with Your Computer Understanding Power-Related Issues Power-related issues are among the most common problems faced by computer users. When your computer refuses to turn on, it can lead to panic and frustration. However, the causes are typically straightforward and can often be resolved easily with some basic troubleshooting steps.   Basic Troubleshooting Steps The first step in troubleshooting power-related issues is to check that the power cable is securely connected to both the power outlet and the computer. For laptop users, it’s essential to ensure that the battery is charged. If the battery is dead, try plugging the laptop into a different outlet or using a different charger if available.   How to Troubleshoot Common Power-Related Issues with Your Computer Understanding Power-Related Issues Power-related issues are among the most common problems faced by computer users. When your computer refuses to turn on, it can lead to panic and frustration. However, the causes are typically straightforward and can often be resolved easily with some basic troubleshooting steps.   Basic Troubleshooting Steps The first step in troubleshooting power-related issues is to check that the power cable is securely connected to both the power outlet and the computer. For laptop users, it’s essential to ensure that the battery is charged. If the battery is dead, try plugging the laptop into a different outlet or using a different charger if available. Investigating Further If your computer still fails to power on, disconnect all external devices such as USB drives, printers, and monitors. Sometimes, peripherals can create conflicts preventing the system from booting. Also, inspect the power button and indicator lights for any signs of physical damage or malfunction. If none of these basic steps resolves the issue, it may indicate a more serious problem involving the power supply unit (PSU) or internal components. Understanding Unprompted Shutdowns: Causes and Solutions What are Unprompted Shutdowns? Unprompted shutdowns and restarts can be incredibly frustrating, especially when you lose important work. These unexpected shutdowns often leave users puzzled and anxious about potential data loss or hardware issues. Understanding the fundamental causes can help in mitigating these disruptions. Common Causes of Automatic Reboots There are various factors leading to automatic reboots. One primary cause is operating system updates that require a reboot. Users may also experience shutdowns due to overheating, which can stem from dust buildup within the system or inadequate ventilation. Additionally, faulty hardware components, such as RAM or hard drive failures, can result in unexpected interruptions. Lastly, malware or virus infections are known to affect system stability, resulting in unprompted shutdowns. What to Do When Facing Shutdown Issues If you encounter these issues, monitoring your system’s temperature is essential. Utilize built-in tools or third-party software to check for overheating. Furthermore, reviewing recent updates or newly installed programs can help identify possible culprits behind the shutdowns. Running a complete system scan with antivirus software is crucial to rule out malware infections. If these problems persist, it’s advisable to consult IT professionals who can inspect the hardware and conduct comprehensive diagnostics. An IT partner can proactively monitor your system health, ensuring immediate action is taken to prevent disruptions that could impact your business.  

Read More

Why Your MacBook M4 Pro Battery Drains So Fast Easy Guide

Why Your MacBook M4 Pro Battery Drains So Fast Easy Guide

Discover effective solutions to tackle the battery drain issue on your MacBook Pro M4 Pro. This guide provides easy step Guide  Shop Now Smart Solution Discover effective solutions to tackle the battery drain issue on your MacBook Pro M4 Pro. This guide provides easy steps to check your power settings, manage background applications, and optimize performance for prolonged battery life. Learn how to navigate System Preferences, utilize Battery Saver mode, and monitor application usage to enhance your device’s efficiency. Explore battery health diagnostics and gain tips that will keep your MacBook running longer, whether you’re working from home or on the go. Follow these tips for better battery management and improved performance.   Tech Experts Tips : Understanding Battery Drain in MacBook M4 Pro StIf you’ve noticed that your MacBook M4 Pro’s battery drains more quickly than expected, you’re not alone. Many users experience this issue, and it can be frustrating when you’re on the go. Understanding the potential causes can help you manage battery life effectively.   Click Here PRO TEH PICK Common Reasons for Fast Battery Drain Several factors could contribute to your MacBook’s rapid battery depletion. First, high screen brightness is a significant culprit; reducing it can save considerable battery life. Secondly, background applications using resources may also accelerate drain. Make sure to close unused apps and monitor your Activity Monitor for any unexpected usage.   Click Here for resolution Facebook-f Twitter Youtube Tips to Extend Your MacBook’s Battery Life To maximize the lifespan of your MacBook M4 Pro’s battery, consider these practical tips. Lowering the screen brightness, disabling Bluetooth and Wi-Fi when not in use, and adjusting energy-saving settings can all help. Regularly updating macOS can bring performance improvements, enhancing overall battery efficiency. Lastly, utilizing the Battery Health feature in system preferences can provide insights into your battery’s condition.   By understanding why your MacBook M4 Pro battery drains quickly and implementing these strategies, you can significantly extend its usage time, allowing you to work more efficiently without the constant worry of power depletion.   Shop Now MacBook Pro M4 Liquid Retina XDR Display Apple 2024 MacBook Pro Laptop with M4 chip with 10‑core CPU and 10‑core GPU Maximize Your MacBook’s Battery Life After macOS Sonoma Update Checking Current Battery Health Status Open System Settings > Battery. View your health status. Spot usage patterns over days. Green? Good shape. Yellow needs care. Track apps that hog power.  Go Step By Step    Understanding the Issue If you’ve recently updated to macOS Sonoma and noticed your MacBook’s battery life dwindling significantly, you’re not alone. Many users have reported that their once reliable all-day battery now barely lasts a few hours. The frustration is palpable as frequent charging becomes the norm rather than the exception.   Optimizing Display and Appearance for Power Savings Did you know that screens are one of the main culprits behind battery drain on your MacBook? With a modern LED display, the brightness settings can significantly influence how much power you consume. Adjusting the display settings can lead to quick wins in extending your battery life, especially if you find yourself working on the go Understanding Dark Mode As technology continues to evolve, many users are discovering the benefits of using dark mode on their devices. Dark mode, characterized by a darker user interface, not only offers a stylish appearance but also comes with practical advantages. For instance, it helps reduce eye strain during extended use, especially in low-light conditions.   Shop Now How to Identify and Eliminate Battery Drainers on MacBook Spotlight search “Activity Monitor.” Click Energy tab. Sort by Energy Impact. High numbers? Guilty apps. Select one. Hit the X to stop it. Chrome tabs? Close extras. Fans spin less too. Real fix: Quit Safari with 20 tabs open. Feel the relief. See a dot under app icons? It’s alive in back. Right-click. Choose Quit. Or Apple menu > Force Quit. Pick multiples. It vanish.   Shop Now Final MacBook Sleep Mode Preparations Controlling Display Dimming While Idle Battery settings has “Slightly dim the display.” Keep on. Idle screen fades. Constant save. No glare fights. The Hard Shutdown: Turning Off Unused Radios Before bed, System Settings > Wi-Fi and Bluetooth. Flip off. No pings overnight. Bluetooth mice   Shop Now Understanding Peripheral and Visual Distractions Keyboard Backlight Inactivity Settings In System Settings > Keyboard. Set backlight off after inactivity. Pick 5 seconds. Keys dim fast. Small light, big savings over hours. Type less? Gains grow. Disabling Screen Savers and Dynamic Wallpapers Screen savers switch pics. Waste. Turn off in Desktop & Dock > Screen Saver. Pick static wallpaper too. No motion, no power sip. Dynamic ones dance. Static wins.   Shop Now Conclusion: Sustained Battery Life Post-Update You fixed MacBook battery drain after macOS Sonoma. Top changes: Drop brightness. Run Low Power Mode. Check Activity Monitor daily. These three alone stretch your day. Make it habit. Weekly scans. Update wisely. Your MacBook runs like new.   Shop Now

Read More